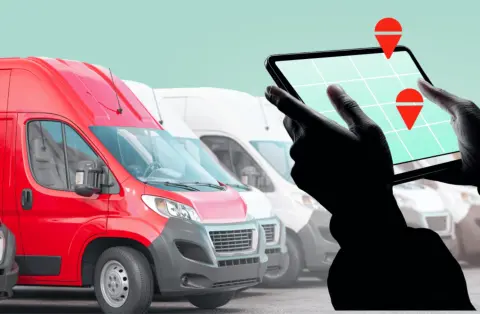



Vehicle tracking technology has become an essential tool for fleet managers and individual vehicle owners alike. Whether you're looking to improve security, monitor driver behaviour, or optimise your fleet operations, understanding how to install a car tracker is the first step towards leveraging these powerful benefits.
In this comprehensive guide, we'll walk you through everything you need to know about installing a vehicle tracking system, from choosing the right device to completing the setup. While we'll focus primarily on self-installation methods that anyone can tackle, we'll also cover professionally installed options to help you make the best decision for your needs.
Understanding vehicle tracker types
Before diving into the installation process, it's important to understand the different types of vehicle trackers available. Each type has its own installation requirements and benefits, and choosing the right one will determine how straightforward your installation experience will be.
OBD-II plug-in trackers
OBD-II (On-Board Diagnostics) trackers are the most popular choice for self-installation. These devices plug directly into your vehicle's OBD-II port, which is typically located under the dashboard near the driver's seat. This port has been mandatory on all UK-manufactured cars since 2001, making OBD-II trackers compatible with most modern vehicles.
The beauty of OBD-II trackers lies in their simplicity. There's no wiring or technical knowledge required, and installation takes just minutes. These devices draw power directly from the vehicle via the port, eliminating concerns about the battery.
Battery-powered GPS trackers
Battery-powered trackers offer maximum flexibility and can be placed virtually anywhere in or on a vehicle. These portable devices are ideal for temporary tracking needs or situations where you want a completely wireless solution. They require no connection to vehicle power and often feature magnetic mounting options for discreet placement.
The portability of battery-powered trackers makes them incredibly versatile. You can easily move them between vehicles, and they're perfect for asset tracking beyond just vehicles; think trailers, equipment, or even high-value cargo. Battery life typically ranges from days to months, depending on the model and reporting frequency, though this does mean you'll need to monitor and recharge them periodically.
Hardwired trackers
Hardwired trackers are professionally installed devices that connect directly to your vehicle's electrical system. While they require professional installation, they offer the most robust and tamper-resistant solution. These systems provide a continuous power supply without battery concerns and are the most secure option, as they are difficult to detect or remove once properly installed.
Many insurance companies prefer or require hardwired trackers, particularly Thatcham-approved systems, and may offer discounts for their installation. They can also integrate with vehicle immobilisers, providing an additional layer of security. Professional installation ensures optimal placement and concealment, making these the gold standard for high-value vehicles or security-critical applications.
Comparison of tracker types
Tracker Type | Installation Time | Skill Level Required | Cost Range | Best For | Tamper Resistance |
|---|---|---|---|---|---|
OBD-II | 5-15 minutes | None | £50-£200 | Most vehicles, quick setup | Low-Medium |
Battery-Powered | 15-30 minutes | Basic | £40-£150 | Temporary tracking, multiple assets | Low |
Hardwired | 2-4 hours | Professional | £200-£500+ | High-value vehicles, fleet standardisation | High |
Understanding telematics basics will help you appreciate how these different tracker types collect and transmit data to improve your vehicle management capabilities.
Preparing for vehicle tracking installation
Proper preparation makes the installation process smoother and ensures optimal tracker performance. Your choice of tracker should align with your specific requirements, taking into account factors like vehicle type, security needs, and how you'll use the tracking data.
Choosing the right tracker for your needs
Fleet managers face different considerations. Professional fleet management solutions often require hardwired installations to ensure reliability and prevent tampering. When selecting trackers for multiple vehicles, look for systems that integrate with existing telematics platforms and consider scalability across your entire fleet. The reporting and analytics capabilities become crucial when you're managing dozens or hundreds of vehicles.
If you're managing employee-owned vehicles used for business purposes, grey fleet management requires careful consideration of privacy and ease of installation. Removable OBD-II trackers are often the preferred solution here, as they can be easily installed when employees join the programme and removed when they leave, or the vehicle is no longer used for business purposes.
Essential items for self-installation
For OBD-II tracker installation:
Vehicle tracker device and accessories.
Vehicle owner's manual.
Cleaning cloth.
Smartphone with an internet connection.
For battery-powered tracker installation:
Fully charged tracker device.
Mounting hardware (adhesive pads or magnetic mount).
Cleaning supplies (rubbing alcohol works well).
Cable ties (optional, for extra security).
Smartphone with an internet connection.
Understanding legal requirements
Before installing any tracking device, it's crucial to understand UK vehicle tracking laws. You must own the vehicle or have explicit permission to install tracking equipment. For business applications, employees must be informed if company vehicles are tracked, and any data collected must comply with GDPR.
Privacy rights must be respected, particularly regarding personal use of company vehicles. Clear policies should outline how tracking data will be used, who has access to it, and how long it will be retained. Transparency isn't just a legal requirement; it's essential for maintaining trust with employees and ensuring your tracking programme succeeds.
How to install a car tracker: OBD-II devices
OBD-II trackers are the most straightforward option for self-installation. The entire process typically takes less than 15 minutes, even for first-time installers, and requires no special tools or technical expertise.
Step 1: Locate your vehicle's OBD-II port
The OBD-II port is a 16-pin connector that's typically located under the dashboard on the driver's side, near the steering column. By regulation, it must be within 60cm of the steering wheel, though the exact position varies by manufacturer. Some vehicles hide the port behind a small panel or cover, while certain European models may place it in less obvious locations, such as the centre console or the passenger side.
Common OBD-II port locations by vehicle type:
Vehicle Origin | Typical Location | Notes |
|---|---|---|
British/European | Lower left of the dashboard, sometimes the centre console | Maybe behind the removable panel |
Japanese | Under the dashboard, driver's side | Usually easily accessible |
American | Near the steering column or under the dashboard | Often visible without removing panels |
German Premium | Centre console or passenger side | It can be less intuitive to locate |
Consult your vehicle's owner manual if you're having trouble locating it. Alternatively, a quick online search for your vehicle's make, model, and year, along with "OBD-II port location", usually yields helpful diagrams or photos. The port itself is a trapezoid-shaped connector with two rows of pins.
Step 2: Inspect the port and tracker
Before plugging in your device, take a moment to check the OBD-II port for any debris or damage. Dust and dirt can accumulate over time, particularly if the port has never been used. Clean the port gently with a dry cloth, if needed, and be careful not to bend any of the pins inside.
Examine the tracker's connector pins to ensure they're straight and undamaged. If any pins appear bent, do not attempt to force the connection. Contact your supplier for a replacement, as damaged pins can cause poor connections or even damage your vehicle's diagnostic system.
Step 3: Install the tracker device
The actual installation is remarkably simple. Ensure the vehicle ignition is off before beginning. Align the tracker's connector with the OBD-II port, matching its shape to the port opening. Push the device firmly into the port until it's fully seated. You should feel a slight click when properly connected.
Some OBD-II trackers come with extension cables that allow you to position the device more discreetly while maintaining the OBD-II connection. This can be useful if you want to tuck the device up under the dashboard, where it's less visible.
Step 4: Power on and verify the connection
Turn on your vehicle's ignition and look for LED indicators on the tracker. Most devices have lights showing power status and GPS signal acquisition. The power light typically illuminates immediately, while the GPS indicator may blink as it searches for satellites. Wait 2-3 minutes for the device to establish both GPS and cellular connections.
Most devices will display a solid or slowly blinking light when successfully connected.
Step 5: Download and configure the tracking app
Modern vehicle trackers work with smartphone applications that provide real-time access to your vehicle's location and data. Download the manufacturer's app from the App Store or Google Play, then create an account using the credentials provided with your device. You'll need to enter your tracker's unique ID or serial number, which is usually found on the device itself or on the packaging.
Step 6: Test the system
Before considering the installation complete, verify that your vehicle's location appears correctly in the app. The GPS coordinates should match your current location within a few meters. Take a short drive to confirm real-time tracking works properly. You should see your vehicle's position update on the map as you move.
Ensure data is being recorded properly by checking the trip history after your test drive. Finally, confirm that the tracker isn't interfering with any vehicle systems.
Installing battery-powered GPS trackers
Battery-powered trackers offer different installation considerations due to their wireless nature. The lack of a fixed connection point gives you much more flexibility in placement, but it also requires more thought about optimal positioning.
Choosing the optimal placement location
Strategic placement is crucial for battery-powered trackers. The ideal location balances several competing factors: GPS signal reception, cellular signal strength, protection from extreme temperatures, concealment for security purposes, and easy access for battery changes.
Recommended placement locations ranked by effectiveness:
Location | GPS Signal | Concealment | Accessibility | Temperature Stability |
|---|---|---|---|---|
Under the front seats | Good | Excellent | Good | Good |
Behind dashboard panels | Fair | Excellent | Poor | Good |
Boot/cargo area | Excellent | Good | Excellent | Fair |
Glove compartment | Fair | Poor | Excellent | Good |
Under chassis (exterior) | Excellent | Excellent | Fair | Poor |
Under seats is one of the most popular locations, as the device can be secured to the frame while remaining relatively accessible. The glove compartment offers easy access but may not provide optimal GPS signal reception. Behind interior panels or trim provides excellent concealment but makes battery changes more difficult. The boot or cargo area works well for larger vehicles, though extreme temperatures can shorten battery life.
Securing the device
Proper mounting prevents the tracker from moving during vehicle operation, which could damage the device or create noise. Clean the mounting surface thoroughly with rubbing alcohol or a similar cleaner to ensure adhesive strips bond properly. Any dirt, dust, or oil will compromise the adhesive's effectiveness.
Use the provided adhesive strips or magnetic mount according to the manufacturer's instructions. For permanent installations, consider using cable ties or mounting brackets for additional security. Ensure the device is oriented correctly. Some trackers have specific requirements about which side should face up or toward the sky for optimal GPS reception.
Test that the mounting is secure by gently tugging the device. It should remain firmly in place. If using adhesive, allow the recommended curing time before driving the vehicle. Most adhesives reach full strength after 24 hours, even if they feel secure immediately after application.
Activating and configuring
Charge the device fully before installation. This can take several hours for a completely depleted battery. If your tracker uses a separate SIM card, activate it according to the provider's instructions before inserting it into the device. Some trackers come with pre-installed, pre-activated SIM cards, while others require you to purchase and activate your own SIM card.
Download the companion app and register the device following the same general process as with OBD-II trackers. Configure settings appropriate for a battery-powered device, paying particular attention to reporting frequency. More frequent position updates provide better real-time tracking but drain the battery faster. Many apps allow you to set different reporting frequencies for when the vehicle is moving versus when it is stationary.
Professional installation for hardwired trackers
While this guide focuses on self-installation, understanding professional installation helps you make informed decisions about which solution is right for you. Hardwired trackers represent the premium end of vehicle tracking, offering capabilities and security that self-installed options can't match.
When to choose professional installation
Consider hardwired, professionally installed trackers when security is paramount. If you own a high-value vehicle, classic car, or any vehicle that's a likely target for theft, the tamper resistance of a properly installed hardwired tracker provides peace of mind that plug-in devices can't offer. Thieves familiar with vehicle tracking know to check the OBD-II port first, but finding a well-concealed hardwired tracker is far more difficult.
Insurance requirements often drive the decision toward professional installation. Many insurers require Thatcham-approved trackers for high-value vehicles, and these systems must be professionally installed to maintain their certification. Available insurance discounts can offset installation costs over time, making professional installation a financially sound choice.
What professional installation involves
The process begins with a consultation where the installer discusses your specific needs and requirements. They'll assess your vehicle and recommend the most appropriate tracker model and installation approach. This expertise is valuable because professional installers understand the nuances of different vehicle types and can avoid potential issues that might not be obvious to someone attempting their first installation.
During installation, the technician connects the device to the vehicle's electrical system, typically tapping into the power supply and sometimes connecting to additional systems, such as the ignition or door locks. The device and all wiring are concealed throughout the vehicle, making detection extremely difficult. Professional installers know the best hiding spots for different vehicle types and use techniques that make the installation virtually invisible.
Comprehensive testing follows installation. The technician verifies that all features work correctly, that the device is communicating properly with the tracking platform, and that the installation hasn't interfered with any vehicle systems. They'll also provide training on using the tracking platform and interpreting the data it provides.
Finally, you'll receive installation documentation, including certificates that may be required by your insurance company. This paperwork proves that the tracker was installed to the required standards and can be crucial for maintaining insurance coverage or making a claim on your policy if the vehicle is stolen.
Professional installation costs and timeframes
Installation Type | Duration | Cost Range | Includes |
|---|---|---|---|
Basic hardwired | 2-3 hours | £100-£200 | Device connection, concealment, testing |
Advanced with immobiliser | 3-4 hours | £200-£350 | Full integration, immobiliser connection, certification |
Fleet mobile service | 1.5-2 hours per vehicle | £80-£150 per vehicle | On-site installation, bulk discount |
For fleet applications, many providers offer mobile installation services, with technicians coming to your location to install trackers across multiple vehicles efficiently. This approach minimises disruption to your operations and often reduces the per-vehicle cost compared to taking vehicles to an installation centre one at a time.
Integrating with broader telematics solutions
For businesses, vehicle tracking is just one component of comprehensive RFC telematics services. Integration allows you to combine tracking data with fuel card information to create a complete picture of vehicle operations. You can analyse driver behaviour alongside fuel efficiency to identify which drivers are most economical and which might benefit from additional training.
Comprehensive reports on fleet performance become possible when multiple data sources are integrated. You can see not just where vehicles went, but how much fuel they used, how efficiently they drove, and whether their routes were optimised. This holistic view enables better decision-making about everything from route planning to vehicle replacement schedules.
Research shows that data-driven fleets can outperform the competition by leveraging insights from integrated telematics and tracking systems. The competitive advantage comes not from having data, but from using it effectively to drive continuous improvement.
Regular maintenance and updates
Keep your tracking system performing optimally through regular maintenance. For battery-powered devices, check battery levels regularly and establish a recharging schedule before levels become critical. OBD-II connections should be inspected periodically to ensure they remain secure. Vibration and leg movement can gradually loosen connections over time.
Update tracking apps and firmware when available. Manufacturers regularly release updates that improve functionality, fix bugs, and sometimes add new features. These updates often include security patches that protect your data from emerging threats. Review and adjust alert settings as your needs evolve. What made sense when you first installed the tracker might not be optimal six months later.
Clean the device and its connections periodically, especially on OBD-II trackers that can accumulate dust. Verify that subscription services remain active, as lapsed subscriptions are a common cause of tracking systems failing. Most providers send renewal reminders, but it's worth checking periodically to avoid gaps in coverage.
Troubleshooting common installation issues
Even straightforward installations can encounter problems. Understanding common issues and their solutions helps you get your tracker working quickly without unnecessary frustration or support calls.
GPS signal problems
GPS signal acquisition is one of the most common issues with newly installed trackers. If your tracker isn't acquiring GPS signals, first ensure the device has a relatively clear view of the sky. GPS signals can't penetrate metal effectively, so a tracker placed directly against the vehicle's metal body or under a metal seat may struggle to get a fix.
Wait 5-10 minutes after initial power-on for the first GPS lock. The first time a tracker powers on, it needs to download current satellite data, which takes longer than subsequent position fixes. Move the device away from other electronics that might cause interference. Some aftermarket electronics can generate radio frequency interference that disrupts GPS reception.
Check that the GPS antenna is properly connected if your tracker has an external antenna. Verify that the device is positioned correctly according to the manufacturer's guidelines. Some trackers have specific orientation requirements. If problems persist, try moving the tracker to a different location in the vehicle. Sometimes a change of just a few inches makes a significant difference in signal reception.
Cellular connectivity issues
When the tracker can't connect to the cellular network, start by confirming that the SIM card is properly installed and activated. Many trackers require you to activate the SIM separately before first use, and it's easy to overlook this step. Check that you're in an area with cellular coverage. While coverage is generally excellent in the UK, some rural areas or underground car parks may have limited signal.
Verify that your subscription or data plan is active. Most trackers require an ongoing cellular data subscription, and lapsed payments will prevent the device from communicating. Restart the device by disconnecting and reconnecting power for OBD-II trackers; this means removing and reinserting the device; for battery-powered units, there's usually a power button or reset procedure.
Contact your provider to ensure the device is properly provisioned on their network. Sometimes new devices need to be manually activated on the cellular network before they can connect, and customer support can verify this has been completed.
Power-related problems
For OBD-II trackers that won't power on:
The most common cause is a non-functional OBD-II port. Verify that the vehicle's OBD-II port is supplying power by testing with another device, if possible, or by checking for signs of damage or corrosion on the port's pins. Check for blown fuses that might affect the OBD-II port. Consult your vehicle manual to identify which fuse protects the diagnostic port. Inspect all connections for corrosion or damage, and try a different OBD-II port if your vehicle has multiple ports (some commercial vehicles have more than one).
For battery-powered trackers:
Ensure the battery is fully charged; a completely depleted battery may take 30 minutes of charging before the device shows any signs of life. Check that the charging cable is properly connected and that the power source is working. Some devices have a protective shipping mode that must be deactivated before first use. Consult your manual for instructions.
App and connectivity issues
If you're having trouble with the tracking application, ensure you're using the correct app for your device. Different manufacturers use different apps, and using the wrong one will prevent you from seeing your tracker. Verify your login credentials. Password reset options are available if you've forgotten your details.
Check that your smartphone has internet connectivity. The app needs an active internet connection to retrieve data from the tracker. Update the app to the latest version, as older versions may have compatibility issues or bugs that have since been fixed. Clear the app cache and data, then log in again. This resolves many persistent app issues.
Contact customer support with your device ID for assistance if problems persist. Have your purchase information and device serial number ready, as support teams will need this to access your account and troubleshoot effectively.
Data privacy and compliance considerations
Responsible use of vehicle tracking technology requires attention to privacy and legal compliance. The power to track vehicles comes with significant responsibilities, particularly when tracking employees or collecting data that could be considered personal information.
GDPR compliance for fleet tracking
If you're tracking company vehicles, particularly with employees driving them, you must comply with the General Data Protection Regulation (GDPR). This isn't optional; failure to comply can result in substantial fines and legal complications.
Conduct a Data Protection Impact Assessment (DPIA) before implementing vehicle tracking. This assessment identifies potential privacy risks and demonstrates that you've considered the implications of tracking. Clearly communicate tracking policies to all drivers before installation, explaining what data will be collected, how it will be used, who has access to it, and how long it will be retained.
Only collect data that's necessary for legitimate business purposes. If you only need to verify that vehicles visit customer sites, you don't need to track every movement throughout the day. Implement appropriate security measures to protect tracking data, including encryption, access controls, and secure storage. Establish clear data retention policies, determine how long you need to keep tracking data and delete it once that period expires.
Employee notification and consent
Transparency is essential for maintaining trust and ensuring legal compliance. Inform employees in writing before installing trackers, giving them adequate notice and opportunity to ask questions. Explain what data will be collected and how it will be used. Be specific about whether you'll track location, speed, driving behaviour, or other metrics.
Clarify whether personal use of vehicles will be monitored. If employees can use company vehicles for personal trips, explain how you'll handle this data. Some companies implement "privacy buttons" that employees can activate during personal use, while others simply don't monitor outside business hours.
Provide options for privacy during breaks or personal time. Constant monitoring without any privacy can damage morale and may not be legally justified. Include tracking policies in employment contracts or vehicle use agreements so that expectations are clear from the start. Regularly review and update policies as technology evolves and as you learn what works best for your organisation.
Best practices for ethical tracking
Maintain trust while gaining the benefits of tracking by focusing on business-relevant data rather than excessive monitoring. Use tracking data to support and improve driver performance, not just for punishment. Drivers are more likely to embrace tracking if they see it as a tool for their benefit rather than just surveillance.
Provide drivers with access to their own data so they can see their performance and identify areas for improvement. Implement "privacy zones" around homes or other sensitive locations, and many tracking systems can automatically stop recording when vehicles enter designated areas. Be transparent about how tracking data influences business decisions, whether that's route optimisation, performance reviews, or vehicle allocation.
Regularly audit your tracking practices for fairness and compliance. What seemed reasonable when you started might not stand up to scrutiny as regulations evolve or as your tracking programme expands. Seek feedback from drivers about the tracking system and be willing to adjust policies based on legitimate concerns.
The future of vehicle tracking installation
As technology evolves, vehicle tracking installation continues to become simpler and more integrated. Understanding emerging trends helps you make decisions that will remain relevant as the industry develops.
Emerging technologies
Factory-installed telematics represent a significant shift in vehicle tracking. Many new vehicles come with built-in tracking capabilities, eliminating the need for aftermarket installation. These systems are fully integrated with the vehicle's electronics and often provide more detailed data than aftermarket trackers. However, they may require subscriptions to the manufacturer's services and can be more expensive than traditional trackers.
5G connectivity promises faster data transmission and more real-time insights. Current trackers typically report position every few minutes, but 5G enables near-instantaneous updates. This opens possibilities for real-time traffic optimisation, immediate accident response, and more sophisticated driver assistance features.
AI-powered analytics are transforming how tracking data is used. Rather than simply recording where vehicles go, modern systems can automatically identify patterns, predict maintenance needs, and provide actionable recommendations. Machine learning algorithms can detect anomalies that might indicate theft, unauthorised use, or mechanical problems before they become serious.
Blockchain integration offers enhanced security and tamper-proof data logging. For applications where tracking data might be used for legal or insurance purposes, blockchain provides an immutable record that can't be altered after the fact. Enhanced driver assistance integration means tracking systems increasingly work alongside ADAS (Advanced Driver Assistance Systems) and autonomous vehicle technologies, creating a comprehensive safety and efficiency ecosystem.
The role of comprehensive telematics platforms
Modern fleet management increasingly relies on integrated platforms that combine tracking with other data sources. RFC's approach to telematics services demonstrates how vehicle tracking becomes more valuable when integrated with fuel management, driver behaviour analysis, and operational insights.
The future isn't just about knowing where vehicles are; it's about understanding the complete picture of vehicle operations and using that understanding to drive continuous improvement. Integrated platforms can correlate tracking data with fuel consumption, maintenance records, driver behaviour, and even external factors like weather and traffic conditions. This holistic approach enables optimisation that would be impossible with tracking data alone.
As these systems become more sophisticated, the installation process paradoxically becomes simpler. Cloud-based platforms eliminate the need for complex local infrastructure, and improved device design makes installation more intuitive. The trend is toward systems that anyone can install but that provide enterprise-grade insights and capabilities.
Remember that a successful vehicle tracking installation is just the beginning. The real value comes from consistently using the data, setting up meaningful alerts, and integrating tracking insights with your broader operational strategy. A tracker that's installed but ignored provides minimal value. One that's actively monitored and used to drive continuous improvement becomes an indispensable tool.
Ready to transform your fleet management?
If you're looking to implement comprehensive vehicle tracking across your fleet, Right Fuel Card's telematics services offer professional installation, cutting-edge tracking technology, and integrated analytics that combine vehicle tracking with fuel management for complete operational visibility.
Contact Right Fuel Card today to discuss how our telematics solutions can help your business thrive in an increasingly competitive landscape. Let us help you turn vehicle tracking data into actionable insights that drive real business results. Whether you're managing two vehicles or two hundred, we have the expertise and technology to help you succeed.